Want to Obtain Base Sepolia Testnet Tokens? How Hard Could It Be?
Navigating the Challenges of Deploying NFT Contracts on Base Sepolia Testnet
This blog post shares my experience in tackling the complexities of deploying a simple NFT contract.
Deploying a simple NFT minting smart contract on the Base Sepolia testnet poses significant challenges for beginner developers. Here’s my experience and some tips to help you navigate these obstacles.
First, we need to understand what deployment means in the Web3 world. In Web2, deploying a program typically involves sending it to a server, such as an Amazon server or a GitHub server. Your setup likely includes a rented server.
For example, my Hexo blog setup utilizes a GitHub server; when I run “hexo deploy,” it authenticates with the GitHub server, sends the content of my blog, and GitHub Pages builds and serves my blog so that people can view it on the internet.
In contrast, in the Web3 world, you deploy code to a contract address, which requires sending a deployment transaction and having some tokens to pay for gas fees. While Web2 code deployment involves a centralized server (like AWS or GitHub), Web3 code deployment occurs on a decentralized peer-to-peer network, meaning multiple computers from different users act as one large server (think Ethereum blockchain, Solana blockchain, or Base chain).
To deploy your smart contract program, there are two key concepts to understand. First, you need to execute a transaction for the contract deployment. This means you must make a transaction on the testnet to deploy your contract. That’s the first point to grasp.
The second critical point is that this deployment transaction requires a transaction fee (gas fee). This transaction fee can only be paid with native tokens (you can’t pay this particular transaction fee with a credit card). In our case, the native tokens are Base Sepolia testnet tokens. That is why we need to go through the trouble of obtaining some Base Sepolia testnet tokens.

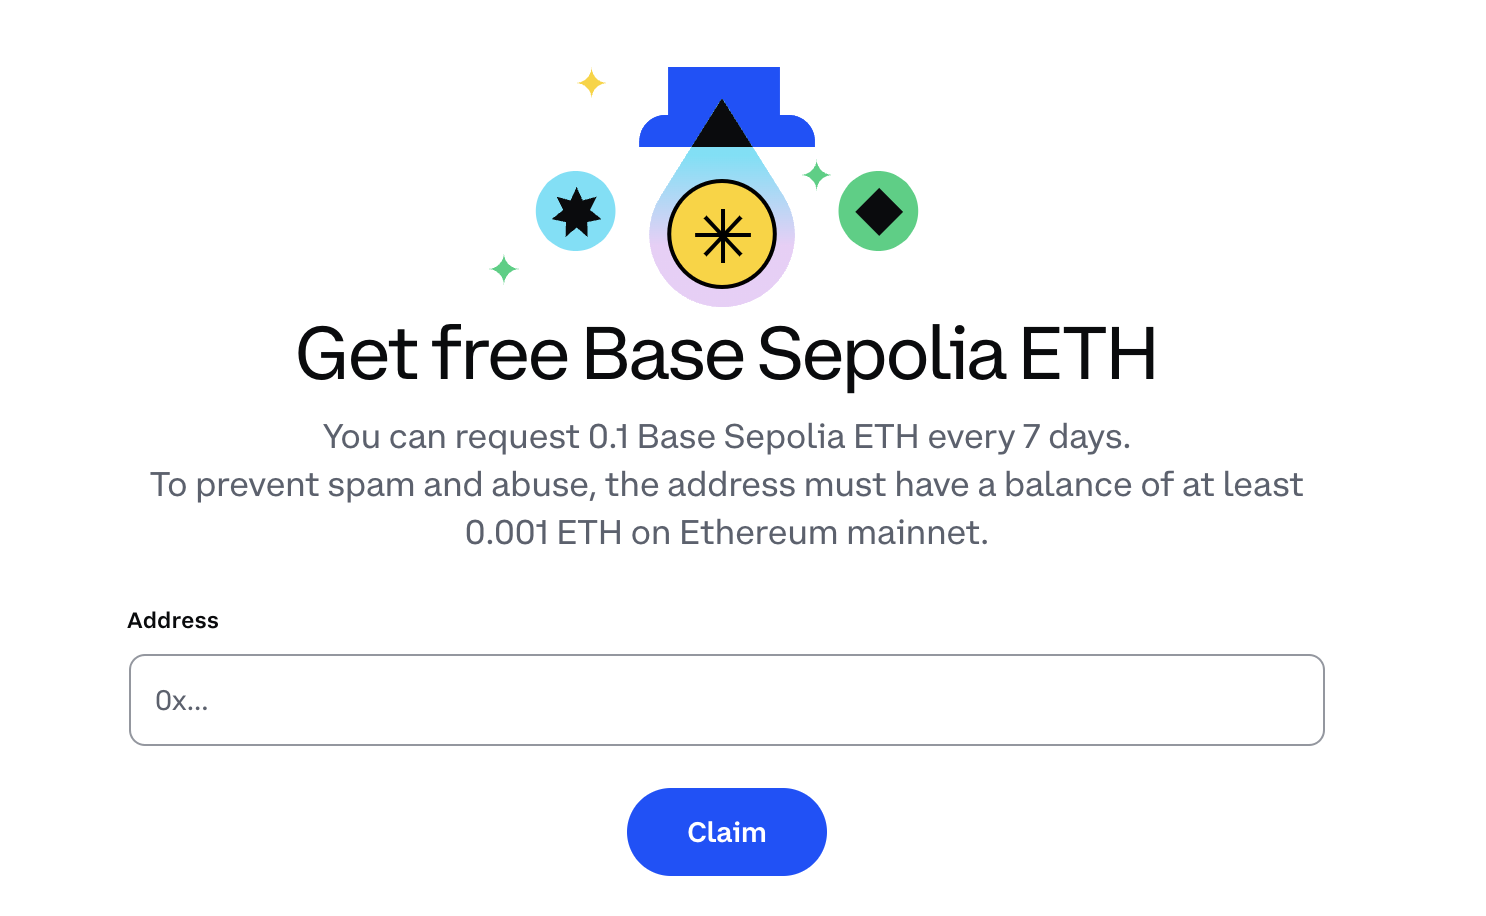
To obtain these tokens, visit a testnet faucet. However, your wallet address must have a minimum balance of 0.001 ETH on the Ethereum mainnet to qualify for receiving testnet tokens.
This requirement helps verify that you are a legitimate user and prevents misuse of the faucet system.
According to official information: “To prevent spam and abuse, the address must have a balance of at least 0.001 ETH on Ethereum mainnet.” Source: https://portal.cdp.coinbase.com/products/faucet).
Preparing for Deployment: Wallets, Networks, Addresses, and Tokens
In my experience, one of the most challenging aspects is understanding that each wallet can have multiple addresses across different networks. For instance, a Foundry wallet may contain several addresses, each capable of accessing different networks like the Ethereum mainnet or the Base Sepolia testnet.
When deploying contracts using one of the addresses in this Foundry wallet, it’s easy to make mistakes. You might accidentally switch to the wrong network, for example, using the Ethereum mainnet with an address set up on Coinbase Smart Wallet that has no balance on the Ethereum mainnet.
Additionally, manually configuring the Base Sepolia network requires special attention. You need to add the Chain ID for Base Sepolia to your MetaMask wallet. Once added, tokens will display the currency symbol as ‘ETH,’ which can be misleading since they do not represent real ETH from the Ethereum mainnet.
It would be clearer if they were labeled as ‘Base Sepolia ETH’ or abbreviated as ‘BETH’ to avoid confusion regarding which network is being used.
Since this manually configured network is not on the Ethereum mainnet, it shouldn’t display “ETH” as if it were on the Ethereum mainnet; this creates confusion about which network you are actually using. The token representation should accurately reflect the network in use to avoid misleading users and ensure clarity in transactions.
Setup Overview
Before we dive into the details, let’s look at what my minimal setup looks like: one mainnet and one testnet. It should be very straightforward; it’s not about having a dozen mainnets and testnets all at once.
Setup Overview
- Networks: Ethereum mainnet and Base Sepolia testnet
- Wallets: Foundry Wallet, Coinbase Smart Wallet, MetaMask Wallet
- Addresses: Foundry’s contract deployer address, Coinbase Smart Wallet’s simulated user address, MetaMask’s Game address
- Tokens: ETH (Mainnet) and BETH (Testnet)
There is the mainnet and there’s the testnet. The term “Mainnet” most commonly refers to the Ethereum Mainnet. As of this writing, 1 ETH on the Mainnet is about $3,893 USD.
Many other networks exist, such as the Optimism (OP) network and Base network, each with their own testnets. For instance, there are OP Testnet and Base Testnet. Additionally, there is another testnet called Sepolia testnet; the most well-known one is the Ethereum Sepolia testnet, followed by Optimism Sepolia testnet and Base Sepolia testnet.
The setup mentioned above has minimized the complexity of wallet, network, and address configurations. There are no multiple addresses pointing to the same wallet; each wallet is associated with only one address.
Here are some rules about wallets, addresses, networks, and tokens:
- A wallet can manage multiple addresses.
- An address can be used across different networks.
- The same address on a given network can hold various tokens.
For example, in the MetaMask wallet, the user typically first locates the wallet, then selects the network, followed by choosing the address, and finally viewing the available tokens.
I had my strategy plan for obtaining Base Sepolia testnet tokens ready, and here’s how it failed.
I wanted to share a particular experience I had while using the ScaffoldETH developer tool to deploy an NFT minting contract on the Base Sepolia testnet. I followed the ScaffoldETH developer workshop instructions from the Devcon Bangkok November 2024 (Hackmd link: Gasless NFT minting app w/ScaffoldETH + Coinbase Smart Wallet https://hackmd.io/@edakturk/Sy6OlPnfyg) and created a Coinbase Smart Wallet account.
I set up what I called a “simulated user address” under this Coinbase Smart Wallet (accessible via wallet.coinbase.com/settings/manage-wallets). This simulated user address was intended to act as if it were a real user interacting with the soon-to-be-deployed NFT smart contract.
My initial idea was to use this simulated user address to interact with the NFT minting contract on Base Sepolia testnet. Meanwhile, I also tried to set up another address specifically for deploying the NFT contract.
In other words, I needed both addresses—one for future user interactions and the other for contract deployment—to have some Base Sepolia testnet tokens in order to proceed with transactions.
To obtain Base Sepolia testnet tokens, I planned to use an existing address that I had previously used for another game project on MetaMask (which I referred to as the “Game address”). This Game address already had some ETH on the mainnet, which I hoped would allow me to successfully acquire Base Sepolia testnet tokens.
The idea was that once I obtained some testnet tokens, I could easily transfer them to both the simulated user address in Coinbase Smart Wallet and the contract deployer address in Foundry Wallet, as both needed funds to facilitate transactions.
Unfortunately, this plan failed, and I wanted to document this experience.

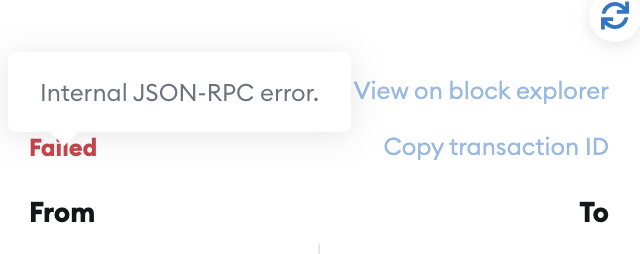
The Game address on my MetaMask wallet successfully claimed 0.1 BETH on the Base Sepolia testnet. The problem occurred when I tried to send some BETH to the simulated user address; this transaction failed with an internal JSON-RPC error message.
I didn’t get to the bottom of this error. It was most likely a technical issue with MetaMask or the Base Sepolia RPC endpoint. It’s hard for me to determine whose fault it was or how to debug the situation. I decided to leave it as is and look for other solutions.
Instead of sending BETH funds from the MetaMask game address to the Coinbase Smart Wallet simulated user address, I chose another approach—I wanted to use the Foundry deployer address to obtain BETH. I used the MetaMask game address to send a small amount of ETH to the Foundry deployer address so that it would become eligible to claim BETH.
To my relief, the Foundry deployer address successfully received the ETH on the mainnet. I was convinced that this action would be enough for this deployer address to be eligible to obtain BETH.
Unfortunately, the plan still failed. It failed because the Base Sepolia testnet faucet on the Coinbase developer platform (https://portal.cdp.coinbase.com/products/faucet) indicated that I had already claimed BETH several hours ago (a fact that was painfully accurate—I had indeed claimed it using the MetaMask game address as my initial plan). I would have to wait a grueling seven days before I could claim BETH again if I continued with the same Coinbase Smart Wallet web2 account.
The quickest way to resolve this at the time was to have another person create a new Coinbase Smart Wallet web2 account and ask this newly set-up account to claim the BETH tokens and send them to my Foundry contract deployer address. It worked because my Foundry contract deployer address already had 0.001 ETH on the mainnet, which I had sent in the previous step.
The instructions in the workshop only mentioned something like, “send some Base Sepolia funds to the deployer account” under the major step of “Deploy your contract to Base Sepolia.” I concluded that my overall experience was quite frustrating.
Concluding Thoughts
In conclusion, the challenges I encountered while deploying my NFT minting smart contract highlighted the complexities of working in the Web3 space.
The most challenging aspect of my journey was obtaining the testnet tokens, which left me stuck for an extended period. Following closely behind was a frustrating React issue that required me to wrap my code in a function, const MintNFT = () => {} (link: Github commit https://github.com/yahsinhuangtw/devcon24/commit/1cd5dd5c607994fbe58473725feb00520a8c13ef#diff-039e5e6b1a1a56d0bf650721f31518e64f5d0df86e685599abb4f4a6aa215169R10), and incorporate two hooks along with some buttons—an experience that deserves its own dedicated post.
I encourage fellow developers to seek support, share experiences, and leverage online communities as we all strive to master this evolving landscape together.
Harnessing Your Learning Journey for Greater Self-Efficacy
The learning journey can be challenging, particularly in the Web3 world. These challenges foster stronger, more independent learners and enhance self-efficacy—your belief in your ability to succeed. For instance, preparing for a difficult coding project requires confidence in learning new programming languages, which significantly impacts performance. This belief shapes how you approach goals and challenges, influencing motivation and resilience.
As self-efficacy improves, your motivation also rises, resulting in a greater drive than you had four months ago. This growth enriches your life beyond just Web3 software development. Individuals with high self-efficacy embrace challenges, persist through difficulties, and view setbacks as growth opportunities. They are more likely to take initiative and set ambitious goals, leading to greater achievement.
Ultimately, viewing the learning of smart contracts as a proud example of self-efficacy can boost your confidence as a self-learner and deepen your belief in your abilities.